Installation:Install
From WiRNS Wiki
Revision as of 03:23, 30 June 2011 by Glenn Reimche (Talk | contribs)
- Log on to Windows with an Administrator level account.
- Run the WiRNS installer (msi package) that you downloaded here.
- Acknowledge the Welcome and License Agreement screens.
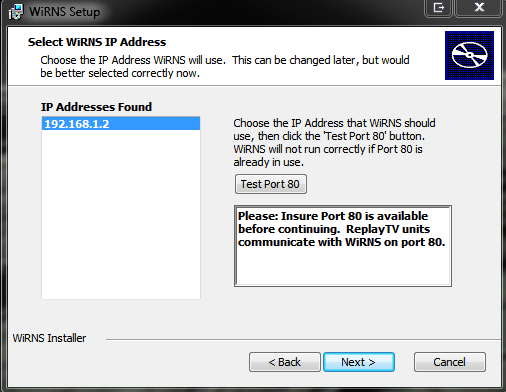
- Select WiRNS IP Address

A list of all the IP addresses available on your system will be presented.
Select your desired WiRNS IP Address and click the Test Port 80 button. If the test is successful, you will get the message OK: Port 80 available for WiRNS and can continue.
If the test fails you will see a message Warning: Port 80 on the selected IP Address is already in use. WiRNS cannot function properly if installed to use this IP Address. At this point you should address the issue before continuing. If you do not you will receive one more warning, but you may continue the installation.
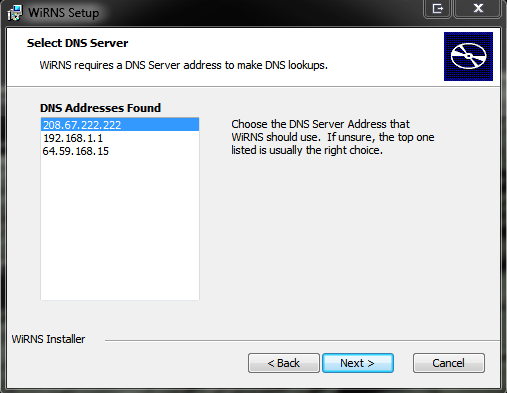
- Select DNS Server

A list of all the Domain Name Server(DNS) addresses known to your system will be presented.
Select your desired DNS Address and continue. You can use any DNS Server with WiRNS, it does not have to be one of these. If you wish to use a different server, you can change it after the installation has completed, using WiRNS Configuration.
- Choose Setup Type
Choose from Typical, Custom or Complete as required, then continue. If you want to change the installation location, choose Custom.
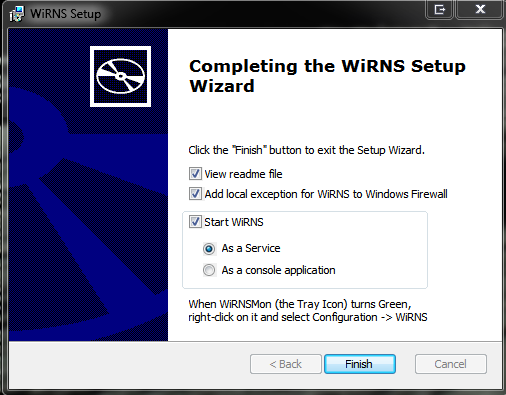
- Completing The WiRNS Setup Wizard

Once WiRNS has been installed, you may complete the process and start WiRNS from this screen. Normally you will start WiRNS as shown, As a Service. Going forward, the WiRNS Service will start automatically whenever you restart your system.
You also have the option of adding an exception for WiRNS to your Windows Firewall. If you have Windows Firewall enabled this will be necessary for the successful operation of WiRNS.
Note that the WiRNS System Monitor tray icon (the red circle with the W) should now appear in your System Tray:
Click Finish to launch WiRNS. The Tray Icon should cycle through Red, Yellow and finally Green to indicate that WiRNS has started successfully. This may take a minute, more or less.
Continue with the Setup Instructions once the icon turns Green.